
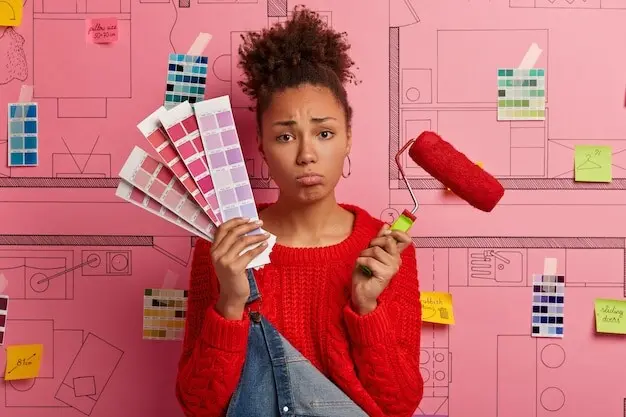
Stick-On Serenity for Renters
Surfaces, Adhesion, and Confidence
Read the Wall
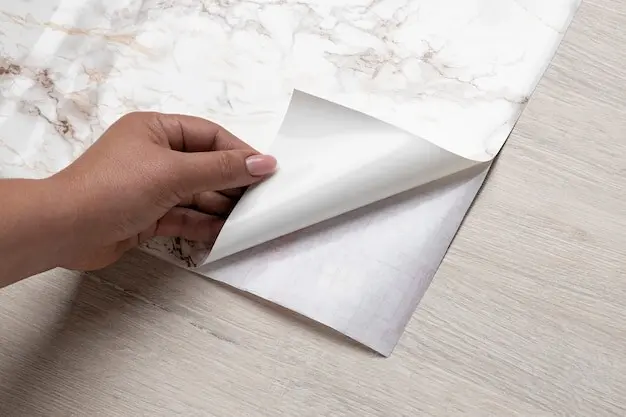
Eggshell and satin paints offer friendlier adhesion than ultra-matte finishes that shed, while glossy enamel, tile, glass, and mirrors provide strong, predictable grip. Test a small disposable tab for twenty-four hours to observe edge-lift, humidity response, and residue. Avoid fresh paint under thirty days, textured stucco, or dusty brick. If a hook or clip slowly peels, the wall is speaking: try a location with less steam, stronger finish, or a vertical surface that carries weight more directly downward.
Prep and Placement
Wipe oils and dust with isopropyl alcohol above seventy percent, then let the surface dry thoroughly before sticking anything. Install within a moderate temperature range, around sixty to eighty degrees Fahrenheit, so adhesives flow and seat correctly. Press for thirty seconds using steady pressure and avoid loading weight immediately. Give tabs at least an hour to settle, preferably a full day for heavier hooks. Align pieces using painter’s tape guidelines so rows look intentional, calm, and visually balanced from every angle.
Weight, Spacing, and Safety
Respect manufacturer weight limits and distribute heavier loads across multiple hooks rather than trusting a single point. Keep delicate items away from beds, cribs, or high-traffic corners where bumps happen. For cable clips, avoid tight bends and tension that creates constant pull. Space hooks so airflow dries damp items quickly, reducing strain on adhesive. If you hear faint creaks or see slow tilt, lighten the load immediately. Safety thrives on small habits: verify, adjust, and let your wall hardware quietly disappear into routine.
Entryway Flow
Kitchen Within Reach
Bathroom Steam Strategy
Hooks That Simplify Everyday Routines
Cable Clips That Calm Chaos
Focused Desk Energy
Set rear-edge anchor points for monitor, laptop, and charger cables, then create a gentle U-shaped drop to the power strip. Leave service loops for sliding a keyboard or docking station without yanking plugs. Label each cable end with a slim removable tag so swaps remain painless. If the desk is shared, use color-coded clips to indicate each person’s run. Even a humble adhesive raceway beneath the tabletop can silence tangles that tug at your wrists, patience, and late-night deadlines.
Living Room Lines
Route TV, soundbar, game console, and streaming box cables horizontally along the back of the media unit, then descend vertically near the outlet using small adhesive hooks as interim anchors. Keep power bricks ventilated and separate low-voltage lines from AC cords. Avoid blocking IR receivers and ventilation grills. A slim clip behind the mantle tucks LED backlight leads out of sight. The goal is quiet geometry—straight runs, soft radiuses, and reassuring stillness when you slide the unit forward for occasional dusting.
Internet Without Drills
When a landlord says no to wall anchors, run thin Ethernet along baseboards with low-profile adhesive clips, hopping door frames at the hinge side where movement is minimal. Avoid tight ninety-degree kinks and mark cable ends with room names. If a hallway requires crossing, flip to a flat adhesive cord cover that blends with flooring. Later, everything lifts cleanly with slow, low-angle pulls. Speed, stability, and a tidy path replace buffering triumphs and spaghetti nightmares, all without a single hole in sight.
LED Strips: Comfort, Clarity, and Character
Pick the Right Light
Warm white around 2700K feels cozy, neutral near 4000K clarifies tasks, and cooler tones can energize morning routines. For accurate colors on books and textiles, aim for CRI ninety or higher. RGBW or RGBIC strips add playful accents for movie nights without overwhelming a small room. Check watts per meter and recommended maximum run length to avoid dimming across long stretches. A modest five to ten watts per meter, thoughtfully placed, usually transforms mood while sipping electricity and respecting monthly budgets.
Mount with Care
Wipe dust, test a small offcut for adhesion, and avoid sharp bends that stress solder joints between cut points. If painted walls are delicate, consider removable mounting channels or tabs with pull-release strips beneath the LED’s own adhesive, creating a sacrificial layer that peels away cleanly. Hide power bricks low behind furniture and guide cords with tiny clips toward outlets. Take your time on corners, using L-connectors or gentle curves. Clean lines and invisible pathways define a polished, renter-friendly finish.
Control and Automation
Add a dimmer or smart plug to schedule evening downshifts that protect sleep and soften blue light. Motion-activated toe-kick lighting welcomes late-night kitchen visits without blasting overhead glare. Group scenes for reading, gaming, or conversations, then store settings for instant recall. Keep remotes labeled and accessible near seating. Consider voice assistants sparingly for hands-free tweaks. By automating tiny transitions through the day, your lighting supports attention, rest, and hospitality—quietly serving routines rather than demanding yet another control to wrangle.
Plan, Measure, and Design
Removal, Care, and Small Repairs
A Clean Release
Warm the adhesive for a few seconds with a low hair dryer setting, then pull the tab slowly back on itself at a shallow angle rather than away from the wall. If resistance rises, pause, re-warm, and continue. For LED channels or thick pads, slide unwaxed dental floss behind the base with gentle sawing motions. Never rush. This choreography prevents paint lift, keeps fragments off your floor, and turns removal into a satisfying finale instead of a nail-biting guess.
Keep It Fresh
Dust hooks, clips, and LED housings during regular cleaning so abrasion never weakens adhesive edges. If a clip loosens, replace the pad rather than pressing harder, which only traps lint and oils. Rotate frequently used hooks seasonally to distribute wear and preserve finishes. Check LED strips for hot spots or dim segments, indicating stressed connections. Care rituals need minutes, not hours, yet they extend life, protect walls, and keep your small systems humming with the quiet confidence that defines renter-friendly order.
All Rights Reserved.